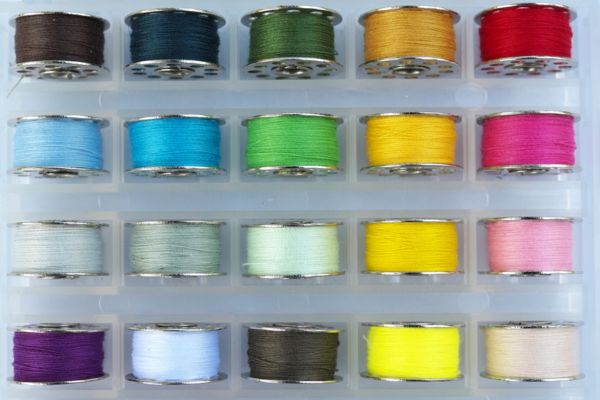
How to Thread a Bobbin Singer? As a sewing enthusiast, I know how frustrating it can be when your sewing machine stops working properly, especially when it comes to threading the bobbin. Threading a bobbin Singer is an essential skill to learn if you want to sew without any interruptions. In this article, I will guide you through the process of threading a bobbin Singer in just a few simple steps.
Introduction to Threading a Bobbin Singer

how to thread a bobbin singer
Threading a bobbin Singer is not as complicated as it may seem. In fact, it is a straightforward process that requires a few basic steps. A bobbin is a small spool that holds the thread for the bottom part of the stitch. To create a stitch, the thread from the top and bottom parts of the machine must interlock. Understanding how to thread a bobbin is essential to ensure smooth sewing.
What is a Bobbin, and Why is it Important?
A bobbin is a small spool that holds the thread for the bottom part of the stitch. It is essential for creating the lower thread tension that is necessary to produce a balanced stitch. Without a bobbin, the sewing machine cannot create a stitch, and your project will not come together.
Understanding the Singer Sewing Machine
The Singer sewing machine is one of the most popular sewing machines in the world. It is known for its durability and ease of use. Before you start threading your bobbin, it is essential to understand the different parts of the Singer sewing machine.
The bobbin case is a small metal or plastic piece that holds the bobbin in place. The needle is the part of the machine that moves up and down to create stitches. The tension knob controls the tension of the thread, which affects the tightness of the stitch. The thread guide is the part of the machine that helps the thread move smoothly through the machine.
Preparing Your Machine for Threading
Before you start threading your bobbin, you need to prepare your machine. First, make sure that your sewing machine is unplugged. Next, remove the needle and presser foot to make sure there are no threads or debris left from your previous project. Finally, make sure that the bobbin case is clean and free from any debris.
Steps to Thread a Bobbin Singer
Now that your machine is ready, let’s get started with threading your bobbin Singer. Follow these simple steps:
- Wind the Thread: Start by winding the thread onto the bobbin. Place the thread spool onto the spool pin and slide the bobbin onto the bobbin winder. Hold the end of the thread and press down on the foot pedal to start winding the thread onto the bobbin.
- Thread the Bobbin Case: Remove the bobbin from the bobbin winder and place it into the bobbin case. Make sure that the thread is coming off the bobbin counterclockwise and that the thread is pulled through the thread guide.
- Insert the Bobbin Case: Insert the bobbin case into the machine and make sure that it is locked into place.
- Thread the Needle: Thread the top part of the machine by following the instructions in your sewing machine manual.
- Test the Stitch: Once you have threaded the machine and bobbin, it’s time to test the stitch. Sew a few stitches on a scrap piece of fabric to make sure that the tension is correct and that the stitches are even.
Troubleshooting Common Threading Issues
Threading a bobbin Singer is a simple process, but sometimes things can go wrong. If you experience any threading issues, there are a few common problems to look out for:
- The bobbin thread is not feeding: Check that the bobbin is correctly inserted into the machine and that the thread is pulled through the thread guide.
- The thread is breaking: Make sure that the thread is not tangled or caught in the machine. Also, check the tension of the thread to ensure that it is not too tight.
- The stitch is uneven: Adjust the tension of the thread until the stitch is even.Threading a bobbin Singer is an essential skill for anyone who wants to learn how to sew. With the right knowledge and preparation, threading your bobbin can be easy and rewarding. After mastering this task, you can start creating beautiful projects with your sewing machine! Good luck!
Tips for Maintaining Your Sewing Machine
To keep your sewing machine running smoothly, it is essential to take proper care of it. Here are a few tips for maintaining your sewing machine:
- Clean your machine regularly: Remove any debris or dust from your machine after each use.
- Oil your machine: Follow the instructions in your sewing machine manual to oil your machine regularly.
- Use high-quality thread: Using high-quality thread will reduce the chances of the thread breaking or tangling while you are sewing.
- Store your machine properly: When not in use, make sure to store your sewing machine in a cool and dry place.With these tips and instructions, threading a bobbin Singer should be a breeze! Now that you know what to do, get sewing! Good luck!
FAQs
Q: How do I know when to replace my needle?
A: Generally, it is recommended to replace your sewing machine needle after every 8-10 hours of use. If you notice that the stitches are becoming uneven or skipping, then it’s time to replace your needle.
Q: What type of oil should I use for my sewing machine?
A: Most sewing machines require a light-weight oil, such as 3-in-1 oil or sewing machine oil. Make sure to check your manual for the best type of oil for your specific model.
Q: What is the best way to store my sewing machine?
A: Store your machine in a clean, dry place away from direct sunlight and heat. Make sure that the machine is covered with a dust cover when it’s not in use. Also, avoid storing your machine near any sources of moisture or dampness.
Conclusion
Threading a bobbin Singer is an essential skill that every sewing enthusiast should learn. With just a few simple steps, you can keep your sewing machine running smoothly and create beautiful projects. Remember to take proper care of your machine to ensure that it lasts for years to come. Happy sewing!


